
Introduction to Custard Thumbprint Cookies
What are Custard Thumbprint Cookies?
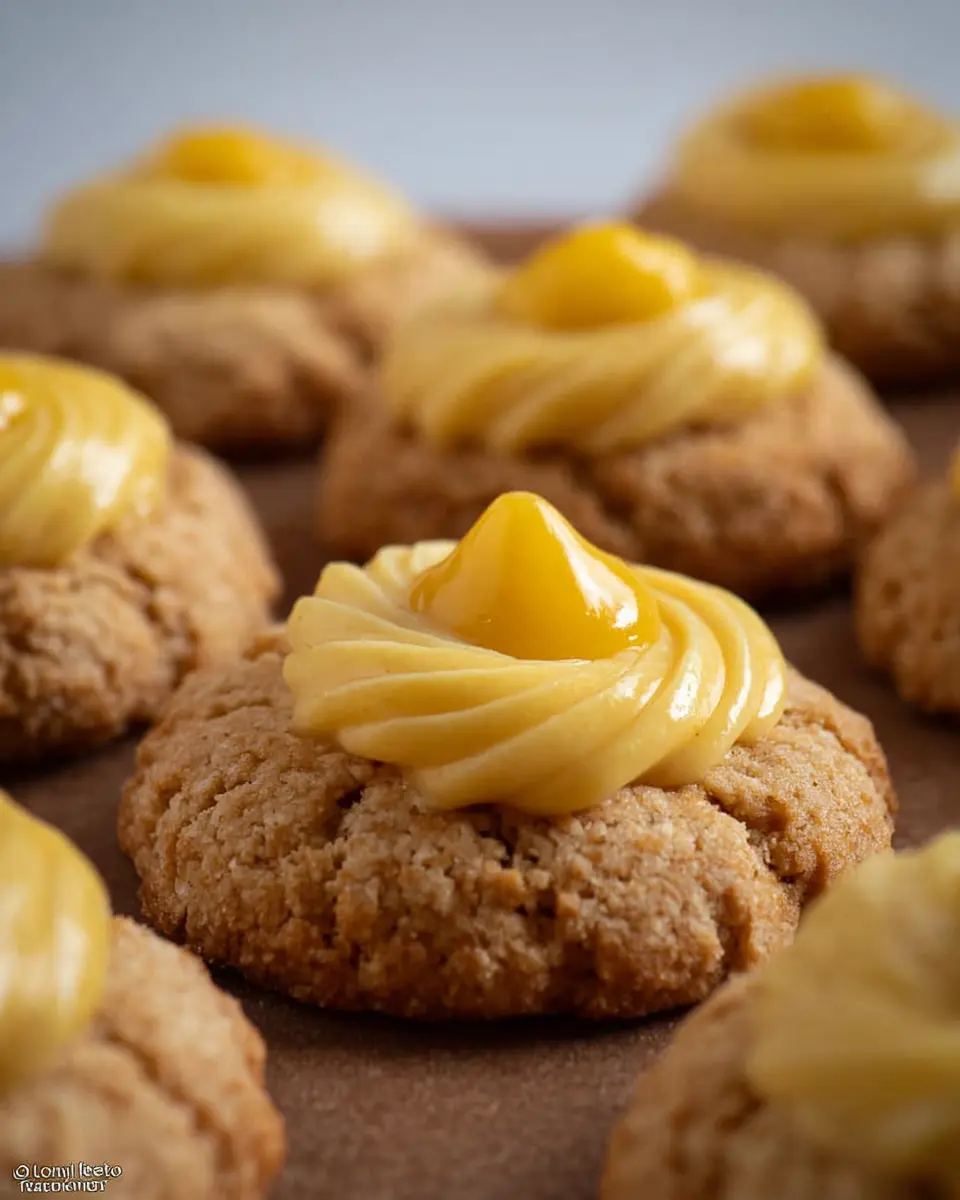
Custard Thumbprint Cookies are a delightful twist on the traditional thumbprint cookie, featuring a soft, chewy base combined with a luscious homemade custard filling. Imagine biting into a cookie that melts away in your mouth, with a creamy burst of custard centrally nestled within. These cookies, popular in American baking, are perfect for both casual snacking and special occasions.
Why you’ll love making these cookies at home
Making Custard Thumbprint Cookies at home is not only rewarding but also incredibly fun! You'll get to experience the joy of creating something special from scratch. The process allows you to experiment with flavors and even try your hand at customizations, like adding chocolate or fruit to the custard. Plus, baking these cookies fills your kitchen with an irresistible aroma that no store-bought cookie can match.
Beyond the delightful taste, these cookies are also a fantastic way to impress friends or family. Offering something unique—like a homemade custard filling—shows off your baking skills and thoughtfulness. With a prep time of just 20 minutes, they’re a quick treat you can whip up for unexpected guests. So gather your ingredients, and let’s dive into making these exceptional cookies! For more baking inspiration, check out sources like Bon Appétit to explore creative variations on cookies.
Ingredients for Custard Thumbprint Cookies
When it comes to baking Custard Thumbprint Cookies, gathering the right ingredients is key to achieving that delightful melt-in-your-mouth experience. Here’s what you’ll need to create these charming cookies.
Key ingredients you'll need
- Brown Sugar: ⅔ cup (140g), giving the cookies depth of flavor.
- Granulated Sugar: ⅓ cup (75g) for sweetness.
- Softened Butter: ½ cup (110g) for a rich texture.
- Vanilla Extract: 2 teaspoons, enhancing the overall taste.
- Large Egg: 1, to bind everything together.
- Custard Powder: ½ cup (65g), essential for the custard filling and cookie dough.
- Baking Soda: ½ teaspoon, providing a bit of lift.
- All-Purpose Flour: 1 and ⅔ cups (215g) for structure.
Optional ingredients for customization
Thinking of jazzing up your Custard Thumbprint Cookies? Consider these fun options:
- Nuts: Chopped walnuts or pecans can add texture and flavor.
- Chocolate Chips: A handful can make a delightful variation.
- Spices: A pinch of cinnamon or nutmeg can elevate the taste.
- Fruit Zest: Lemon or orange zest can introduce a refreshing twist.
These ingredients not only ensure your cookies are delicious but also allow for creativity in your baking adventure. For tips on making perfect custard, check out resources like BBC Good Food, which can guide you through different custard styles. Happy baking!
Preparing Custard Thumbprint Cookies
Making Custard Thumbprint Cookies at home is a delightful experience that blends baking with a touch of culinary creativity. Here’s the step-by-step breakdown on how to prepare these enchanting treats!
Making the homemade custard
Before diving into the cookie dough, let's whip up that heavenly homemade custard. Start by combining:
- ½ Cup Custard Powder
- ½ Cup Sugar
- 1 and ½ Cups Milk
- 1 teaspoon Vanilla Extract
In a saucepan over medium heat, whisk these ingredients together until the mixture begins to boil. Continuous stirring is crucial as it ensures a creamy texture and prevents any lumps. Once thickened, remove it from the heat and stir in the vanilla extract. Set this luscious custard aside; it will transform your Custard Thumbprint Cookies into a dreamy bite of nostalgia.
Prepping your cookie dough
Next, preheat your oven to 180°C (350°F) and line a baking tray with parchment paper. In a mixing bowl, beat together:
- ⅔ Cup Brown Sugar
- ⅓ Cup Sugar
- ½ Cup Butter, Softened
Give this a good mix until creamy and fluffy. Then, crack in one large egg, followed by 2 teaspoons Vanilla Extract. Mix it all until well blended, and you’ll have a fragrant base to work with. Now, progressively add:
- ½ Cup Custard Powder
- ½ teaspoon Baking Soda
- 1 and ⅔ Cups All-Purpose Flour
Keep mixing until fully incorporated, and you’ll notice the dough becomes softer and more malleable, perfect for shaping.
Forming the cookie balls
With your dough ready, it’s time to shape those delightful cookie balls. Use your hands to roll about a tablespoon of dough into a ball. Place them on your baking tray spaced out, as they will spread while baking. This is your chance to let your creativity shine—feel free to make them slightly larger or smaller based on your preference!
Creating the thumbprint and adding custard
Here's where the fun starts! Take your thumb (or the back of a spoon) and gently press down into the center of each cookie ball to create a small indentation. This “thumbprint” will be the perfect pocket for your prepared custard. Carefully fill each thumbprint with your delicious homemade custard, ensuring not to overfill.
Baking the cookies to perfection
Pop your tray into the preheated oven and bake for about 12 minutes. Keep a close eye on them; you want them to be lightly golden around the edges while still soft in the center. Once done, let them cool on the tray for about 10-15 minutes. This resting time not only helps them set but also brings out their delightful flavors.
And there you have it! With just a little patience, you can enjoy these delectable Custard Thumbprint Cookies that will impress friends and family alike. Happy baking!

Variations on Custard Thumbprint Cookies
Chocolate Custard Variation
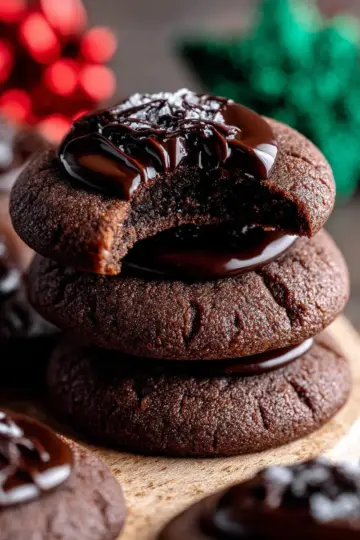
For those with a sweet tooth, why not create a chocolate version of your Custard Thumbprint Cookies? Simply substitute part of the custard powder with cocoa powder—about 2 tablespoons should do—while preparing the custard. The result? A delightful chocolatey custard that pairs beautifully with the chewiness of the cookie.
Fruit-Infused Custard Options
Fruit lovers will adore this twist! Incorporate fruit puree, like raspberry or mango, into the custard. When making the custard, mix in ¼ cup of your favorite fruit puree along with the milk. This adds a vibrant splash of flavor and color to your Custard Thumbprint Cookies, making them perfect for any occasion.
Explore more custard ideas and tips on BBC Good Food. Want to experiment with different fruit flavors? Check out AllRecipes for inspiration!
Cooking tips and notes for Custard Thumbprint Cookies
Ensuring the perfect cookie texture
To achieve that ideal melt-in-your-mouth texture for your Custard Thumbprint Cookies, make sure your butter is softened to room temperature. Overmixing after adding the flour can lead to tougher cookies, so combine the ingredients just until they’re blended. Remember, the dough should be slightly sticky; this enables the cookies to hold their shape as they bake.
Storage tips for longevity
To keep your Custard Thumbprint Cookies fresh and delicious, store them in an airtight container at room temperature. They can last for up to a week—but you know they might not last that long! If you want to enjoy them later, freeze the cookies without custard in a freezer-safe container. Simply thaw and fill with custard before serving. For more detailed storage advice, check out this helpful guide.
Serving Suggestions for Custard Thumbprint Cookies
Perfect Pairings with Drinks and Desserts
When enjoying Custard Thumbprint Cookies, think about pairing them with a warm cup of tea or a frothy latte for a cozy afternoon treat. You could also indulge in a glass of almond or oat milk to enhance the creamy custard center. If you’re hosting friends, consider serving these cookies alongside a vibrant fruit platter or a selection of mini desserts—like chocolate mousse cups or berry tarts. Not only do the flavors complement each other, but they also add variety to your dessert spread!
Creative Serving Presentations
Presenting your Custard Thumbprint Cookies can be just as delightful as making them. Consider arranging the cookies on a beautiful cake stand, with a sprinkle of powdered sugar on top for a touch of elegance. You could also plate them with fresh mint leaves or edible flowers for a colorful touch. If you’re feeling crafty, package a few cookies in a clear cellophane bag tied with a ribbon—they make fantastic homemade gifts!
For more serving ideas, check out this guide on dessert presentations that can elevate your cookie game even further!
Time Breakdown for Custard Thumbprint Cookies
Preparation Time
Getting started on your Custard Thumbprint Cookies is easy, with a preparation time of just 20 minutes. This allows you to gather your ingredients and whip up that creamy custard filling with ease. Make sure all your ingredients are at room temperature for the best results.
Cooking Time
Once your cookie dough is ready, it only takes about 15 minutes to bake these delightful treats. Keep an eye on them as they golden, filling your kitchen with a luscious aroma that’s hard to resist.
Total Time
In just 35 minutes, you can have a batch of scrumptious Custard Thumbprint Cookies ready to enjoy. Perfect for a cozy night in, a gathering with friends, or a sweet treat to accompany your afternoon coffee. These cookies promise a lovely blend of chewy goodness and creamy custard that keeps everyone coming back for more!
For more delicious cookie recipes, check out Less Sugar, More Flavor. Happy baking!
Nutritional facts for Custard Thumbprint Cookies
Calories per cookie
Each Custard Thumbprint Cookie has about 228 calories, making them a delightful treat that won't overindulge your caloric intake. Perfect for an afternoon snack or a sweet finish to your day!
Key nutritional components
These cookies pack in some noteworthy nutrients:
- Carbohydrates: 36g
- Protein: 3g
- Fat: 8g (including 5g saturated fat)
- Cholesterol: 37mg
- Sodium: 116mg
- Fiber: 1g
- Sugar: 24g
With this combination, Custard Thumbprint Cookies are a balance of sweet indulgence and essential nutrients. For those aiming to maintain a balanced diet, enjoy these cookies in moderation. Want to dive deeper into the nutritional benefits of baking? Check out this nutrition guide for more insights!
FAQs about Custard Thumbprint Cookies
Can I make these cookies gluten-free?
Absolutely! You can easily adapt the Custard Thumbprint Cookies recipe to be gluten-free. Just swap out the all-purpose flour for a gluten-free flour blend that includes a binding agent. This will help maintain the cookie's chewy texture while ensuring everyone can enjoy them.
What can I substitute for custard powder?
If you find yourself without custard powder, don't fret! You can create a simple substitute by combining cornstarch with sugar and a pinch of vanilla extract. For each ½ cup of custard powder, use 2 tablespoons of cornstarch mixed with 2 tablespoons of sugar, and add a few drops of vanilla extract to your mixture.
How do I store leftover cookies?
To keep your Custard Thumbprint Cookies fresh, store them in an airtight container at room temperature for up to five days. If you want them to last longer, consider freezing them. Just be sure to layer parchment paper between the cookies to prevent sticking, and keep them in a sealed freezer bag for up to three months.
Feel free to check out more baking tips here and elevate your baking game!
Conclusion on Custard Thumbprint Cookies
In conclusion, Custard Thumbprint Cookies are a delightful treat that perfectly balances a soft, chewy texture with rich, creamy custard. They’re not just a sweet indulgence, but also a wonderful way to impress friends and family during gatherings. Try them out, and enjoy a taste of homemade bliss!
Custard Thumbprint Cookies
Equipment
- saucepan
- Mixing bowl
- baking tray
- Whisk
Ingredients
- ⅔ Cup Brown Sugar (140g)
- ⅓ Cup Sugar (75g)
- ½ Cup Butter, Softened (110g)
- 2 teaspoon Vanilla Extract
- 1 Large Egg
- ½ Cup Custard Powder (65g)
- ½ teaspoon Baking Soda
- 1 and ⅔ Cups All Purpose Flour (215g)
Custard
- ½ Cup Custard Powder (65g)
- ½ Cup Sugar (100g)
- 1 and ½ Cups Milk
- 1 teaspoon Vanilla Extract
Instructions
- First make the custard by placing the custard powder, sugar and milk in a saucepan on a low to medium heat.
- Let the mixture come to the boil stirring constantly with a whisk.
- Once the mixture thickens, take off the heat and stir in the vanilla extract. Set aside.
- Preheat the oven to 180°C (350°f) and line a baking tray with baking paper.
- In a bowl, beat the brown sugar, sugar and butter together.
- Add the egg and vanilla extract and beat.
- Beat in the custard powder, baking soda and flour and mix until all combined.
- Roll into balls and place on the baking tray.
- Using your thumb, press a thumbprint into the middle of each cookie and then fill the dent you have made with the custard.
- Bake for around 12 minutes. The cookies will have spread slightly and be a golden colour.
- Allow them to cool for 10-15 minutes before removing from the tray.


Leave a Reply