
Introduction to Homemade Bread
Baking homemade bread is not just a skill—it's a delightful experience that transforms your kitchen into a warm, inviting space. Why is homemade bread a game-changer? For starters, it eliminates the mystery often associated with store-bought options. You control the ingredients, ensuring it’s fresh, wholesome, and free from preservatives or unwanted additives. Imagine biting into a warm slice of bread that you made yourself, the aroma enveloping you like a cozy blanket.
Moreover, making your own bread can be a rewarding and surprisingly easy task. With just six simple pantry ingredients, you can whip up a batch that’s not only perfect for sandwiches but also ideal for toasting or slathering with your favorite toppings. Baking bread allows you to experiment with flavors—think herbs, seeds, or even cheeses!
On top of that, you'll save money over time, especially if you have a family that loves bread. For tips and more insights on the incredible benefits of homemade bread, check out resources like the Bread Bakers Guild of America for expert advice and inspiration as you embark on your bread-making journey!
Ingredients for Homemade Bread
Essential Pantry Ingredients
Making homemade bread is simpler than you might think, especially with just a few essential ingredients from your pantry. You'll need:
- Warm Water: 2 cups, to activate the yeast.
- Active Dry Yeast: 1 tablespoon, critical for that delightful rise.
- Honey or Sugar: ¼ cup, for a hint of sweetness.
- Salt: 2 teaspoons, to enhance the flavor.
- Oil: 2 tablespoons of canola or vegetable oil, contributing to tenderness.
- Flour: Between 4 to 5 ½ cups of all-purpose or bread flour, forming the structure of your loaf.
These basic ingredients set the stage for a loaf that’s perfect for sandwiches or toast.
Optional Add-ins for Flavor
Want to elevate your homemade bread? Consider adding some extra ingredients for a burst of flavor:
- Herbs: Rosemary or thyme can enhance the aroma.
- Cheese: A cup of shredded cheese for a cheesy loaf.
- Seeds: Sunflower or sesame seeds add texture.
- Dried Fruits or Nuts: For a sweet-savory contrast.
Experiment with these optional ingredients to create a unique loaf that suits your palate. Happy baking! For more bread tips, check out King Arthur Baking for inspiration.
Preparing Homemade Bread
If you’re new to baking, making homemade bread may seem daunting, but I assure you, it's a rewarding experience that fills your kitchen with warmth and delicious aromas. Follow these simple steps, and you'll be enjoying fresh bread in no time!
Step 1: Proof the yeast
The first crucial step in preparing homemade bread is to proof the yeast. In a large bowl, combine 2 cups of warm water (between 105-115°F) with 1 tablespoon of active dry yeast and a pinch of sugar or honey. Let this mixture sit for about 5-10 minutes. If your yeast is active, you’ll see it foam and bubble. This means you’re ready to move forward! If there’s no bubbling, it’s best to start over with fresh yeast to ensure a successful rise.
Step 2: Combine ingredients
Next, add remaining ingredients to the yeast mixture: ¼ cup of honey or sugar, 2 teaspoons of salt, and 2 tablespoons of oil. Gradually add in 3 cups of flour, mixing until all ingredients are well combined. As you start incorporating more flour, you'll notice the dough coming together and pulling away from the sides of the bowl. It's okay if it's slightly sticky; you can always add a little more flour until you achieve a smooth and elastic texture.
Step 3: Knead the dough
Kneading is where the magic happens! If you have a stand mixer, mix the dough on medium speed for about 4-5 minutes. Alternatively, you can get your hands a little messy and knead by hand on a floured surface for 5-8 minutes. The goal is to develop the gluten, making your bread light and airy.
Step 4: First rise
A warm, cozy spot is ideal for your dough's first rise. Grease a large bowl and place the dough inside, turning it to coat. Cover it with a dish towel or plastic wrap and let it rise in a warm environment until it doubles in size, approximately 1.5 hours.
Step 5: Shape and second rise
Once your dough has risen successfully, it’s time to punch it down to remove air bubbles. Divide it into two equal pieces and shape each into a log. Place them into greased loaf pans and cover them gently. Allow the dough to rise again for another 45 minutes to an hour. This time, watch for the dough to rise about an inch above the pans.
Step 6: Bake the bread
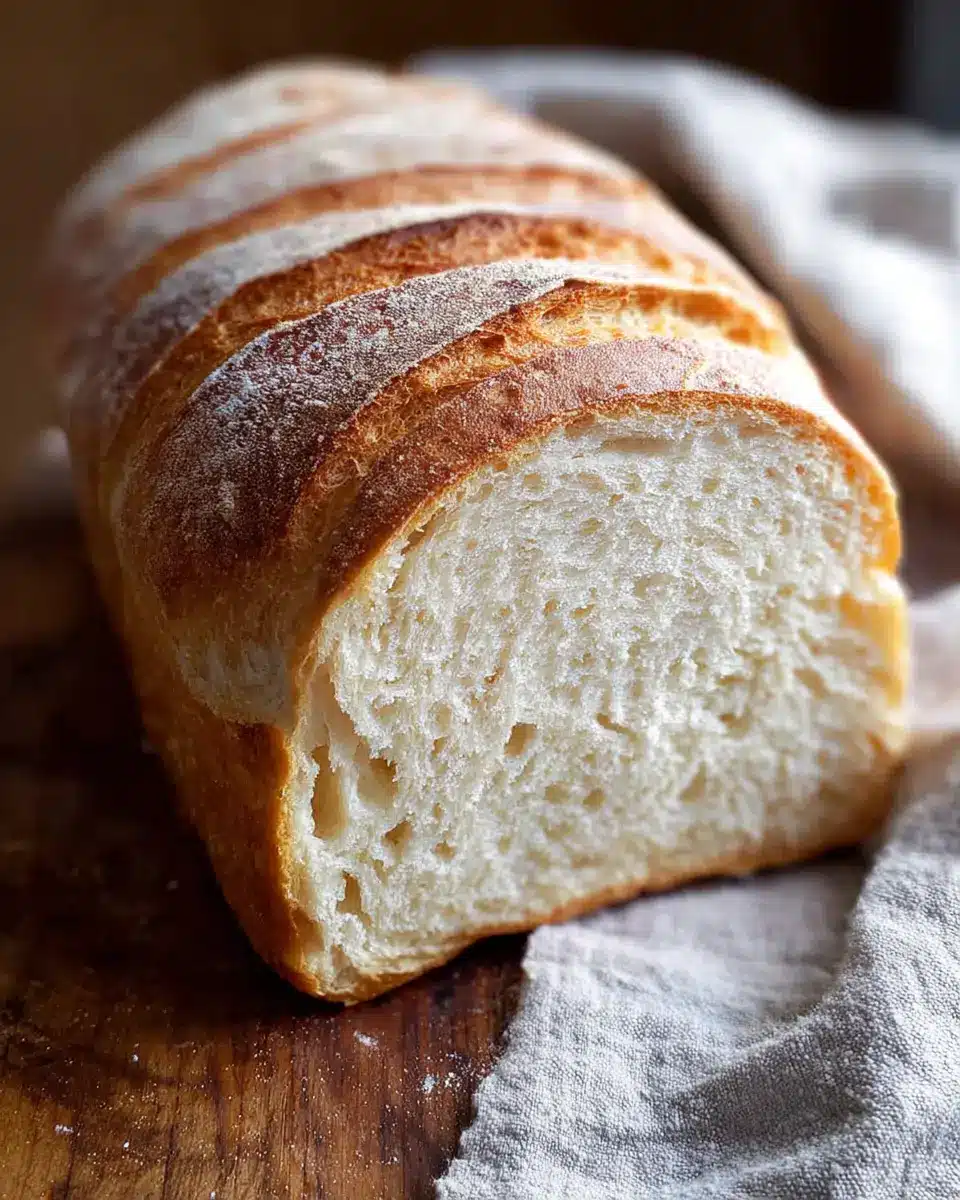
Preheat your oven to 350°F and bake the loaves for 30-33 minutes, or until they are golden brown on top. Tap the loaf gently; it should sound hollow. Once baked, invert the loaves onto a wire rack, brush with butter, and let them cool for about 10 minutes before slicing into that gorgeous homemade bread. Trust me; the taste will be worth every minute!
Now you know how to prepare your homemade bread! What's stopping you from indulging in this delightful baking experience? Happy baking!
Variations on Homemade Bread
Whole Wheat Homemade Bread
For a healthier twist on classic homemade bread, try incorporating whole wheat flour. This option boosts fiber content and offers a nuttier flavor. Simply substitute half (or more) of the all-purpose flour with whole wheat flour. You might need to increase the water slightly, as whole wheat absorbs more moisture. Not only does it add richness, but it also makes every slice a bit more nutritious. For more detailed guidance, check out my favorite Whole Wheat Bread recipe.
Herb-Infused Homemade Bread
Adding fresh herbs to your homemade bread can elevate its taste dramatically and make your kitchen smell divine! Consider mixing in herbs like rosemary, thyme, or basil during the kneading stage. You can also sprinkle some atop the loaves before baking for an aromatic crust. Infusing your bread with herbs is a fantastic way to customize your loaf – perfect for pairing with soups or as a sandwich base. Have you ever tried rosemary focaccia? It’s delightful!
Cooking tips and notes for Homemade Bread
Troubleshooting common issues
Creating the perfect homemade bread can be tricky, but a little troubleshooting goes a long way! If your bread is dense, it may be under-kneaded or too much flour was added. Conversely, if your loaf is too airy, reduce the rise time next time. Not sure if your yeast is active? Always proof it first—bubbly yeast is happy yeast!
Tips for perfect crust and texture
For that golden, crispy crust, try placing a shallow dish of water in the oven when baking. This will create steam, giving your crust a beautiful finish. For a softer texture, brush melted butter on the crust immediately after baking. You can also experiment with different flours like whole wheat for varied texture in your next homemade bread project! Want more baking tips? Check out King Arthur Baking for expert guidance.
Serving Suggestions for Homemade Bread
Best Pairings for Sandwiches
When it comes to using your homemade bread for sandwiches, the sky's the limit! Top it with classic ingredients like Turkey Bacon, Chicken Ham, or roasted vegetables for a mouthwatering lunch. Try your hand at creating a savory grilled cheese with gooey melted cheese and fresh basil—perfect for a cozy evening. For a lighter option, pile on fresh greens, hummus, or a zesty guacamole spread. You can even whip up a delectable tuna salad for a protein-packed meal!
Creative Uses for Leftover Bread
Don’t let leftover homemade bread go to waste! Transform it into flavorful croutons by cubing the bread, tossing it with olive oil, garlic, and herbs, then baking until golden. Alternatively, you can blend it into breadcrumbs for added texture in your favorite dishes. Think bread pudding, French toast, or even a savory strata for brunch! For a wholesome snack, consider making bruschetta topped with diced tomatoes, garlic, and a drizzle of balsamic vinegar. These ideas will help you enjoy every last crumb!
Time Breakdown for Homemade Bread
Preparation Time
Making homemade bread starts with a quick 15-minute preparation period. This includes gathering your ingredients and mixing them to create your dough. You can easily multitask during this phase—perhaps set the table or have a chat with a friend while mixing!
Rising Time
The rising time is crucial for developing flavor and texture. You’ll need about 3 hours in total for the dough to rise properly. Initially, let it rise for 1.5 hours until doubled in size. After shaping, allow another 45 minutes to 1 hour for the second rise.
Baking Time
Finally, the baking process takes around 30 to 33 minutes. You’ll know it’s ready once the top is golden brown and sounds hollow when tapped. This part creates that irresistible aroma wafting through your kitchen, signaling that your homemade bread is almost here!
For more tips on making the perfect homemade bread, check out resources like the King Arthur Baking Company for expert advice.
Nutritional Facts for Homemade Bread
Calories
A slice of homemade bread contains approximately 202 calories. This makes it a satisfying option for a hearty sandwich or as a side to your favorite stew.
Carbohydrates
With around 41 grams of carbohydrates per slice, this bread provides energy to fuel your day, making it an excellent choice for breakfast or lunch.
Protein
Each slice offers about 5 grams of protein, helping to keep you full and energized. Pair it with turkey bacon or chicken ham for a protein-packed meal!
For more detailed nutritional insights, you can always refer to resources like NutritionData or MyFitnessPal.
FAQ about Homemade Bread
Can I use instant yeast instead of active dry yeast?
Absolutely! You can use instant yeast instead of active dry yeast without a hitch. Just skip the proofing step—add it directly with your flour and other ingredients. This may save you some time since the dough will rise faster!
How do I store homemade bread?
To enjoy your freshly baked homemade bread at its best, store it in an airtight container or bag. It should stay fresh for about 2-3 days at room temperature. If you want to prolong its shelf life, consider refrigerating it for up to 5 days. Just remember, the fridge can sometimes dry it out, so sealing it well is key.
Can I freeze homemade bread?
Absolutely! Freezing is a great option to keep your homemade bread delicious. After cooling, wrap each loaf in plastic wrap and place it in a freezer-safe bag. Your bread will stay fresh for up to 3 months. To enjoy it, simply thaw overnight in the fridge or at room temperature. For more detailed freezing instructions, check out this resource on freezing bread.
Conclusion on Homemade Bread
Making homemade bread is not only rewarding but also a wonderful way to enjoy fresh flavors in your meals. With just six basic ingredients, this easy recipe will have you baking delicious loaves in no time. Perfect for sandwiches, toasting, or simply enjoying with butter, you'll find it to be a versatile staple in your kitchen. Happy baking!
Homemade Bread
Equipment
- Loaf pan
- Bosch Mixer
Ingredients
- 2 cups warm water (105-115 degrees)
- 1 Tablespoon active dry yeast
- ¼ cup honey or sugar
- 2 teaspoons salt
- 2 Tablespoons oil (canola or vegetable)
- 4 - 5 ½ cups all-purpose or bread flour
Instructions
Preparing the Dough
- In a large bowl or stand mixer add the yeast, water, and a pinch of sugar or honey. Allow to rest for 5-10 minutes until foaming and bubbly.
- Add remaining sugar or honey, salt, oil, and 3 cups of flour. Mix to combine.
- Add another cup of flour and mix to combine. Slowly add more flour until the dough pulls away from the sides.
Kneading
- Mix the dough for 4-5 minutes on medium speed, or knead by hand for 5-8 minutes.
First Rise
- Grease a large bowl with oil and place dough inside, turning to coat. Cover and allow to rise until doubled, about 1 ½ hours.
Preparing for the Second Rise
- Divide the dough into two equal portions. Shape each into long logs and place them in greased loaf pans.
- Cover pans and allow to rise again for about 45 minutes to 1 hour.
Baking
- Preheat oven to 350 F. Bake bread for about 30-33 minutes, until golden brown.
- Invert the loaves onto a cooling rack and brush the tops with butter. Allow to cool before slicing.


Leave a Reply