
Introduction to Classic Cheese Ball
The classic cheese ball has been a staple at gatherings for decades, and it’s easy to see why. It's more than just a dish; it’s a crowd-pleaser that brings people together. Picture this: a creamy, savory blend of sharp cheddar and cream cheese, rolled into a ball and coated with crunchy pecans. Sounds irresistible, right? This simplicity is part of its charm, as it requires minimal prep yet delivers maximum flavor, making it the perfect addition to any charcuterie board or appetizer spread.
It’s hard to find a party that doesn’t feature a cheese ball. Whether it’s a birthday celebration, holiday get-together, or casual potluck, this delightful treat invites guests to mingle while enjoying delicious bites. Plus, it pairs perfectly with crackers, pretzels, or fresh veggies, allowing for endless dipping options. For tips on creating your own cheese ball, check out resources like Tastes Better From Scratch for expert insights and variations.
As you embark on your journey to create the ultimate classic cheese ball, prepare yourself for a fun and delicious experience that is sure to become a well-loved tradition in your circle.
Ingredients for Classic Cheese Ball
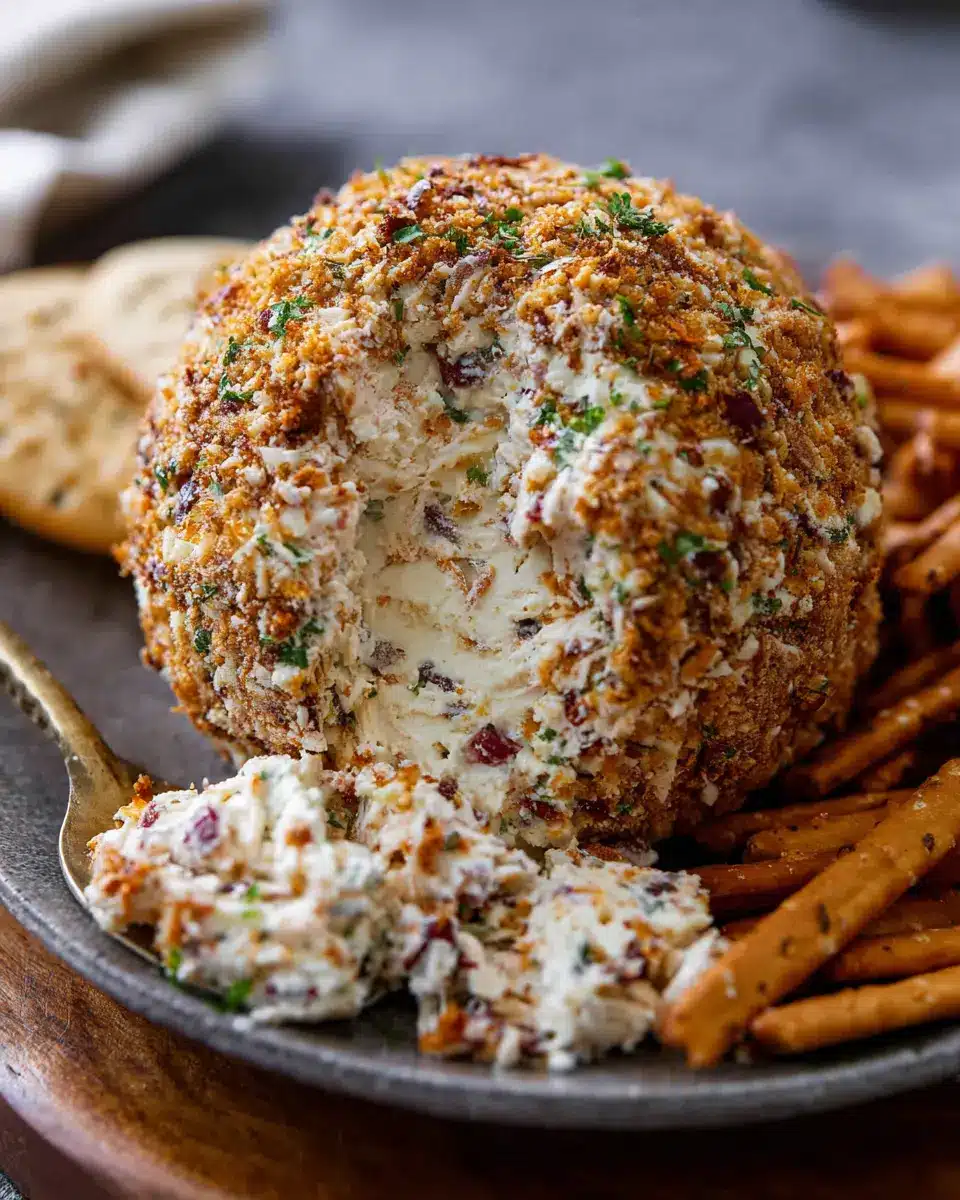
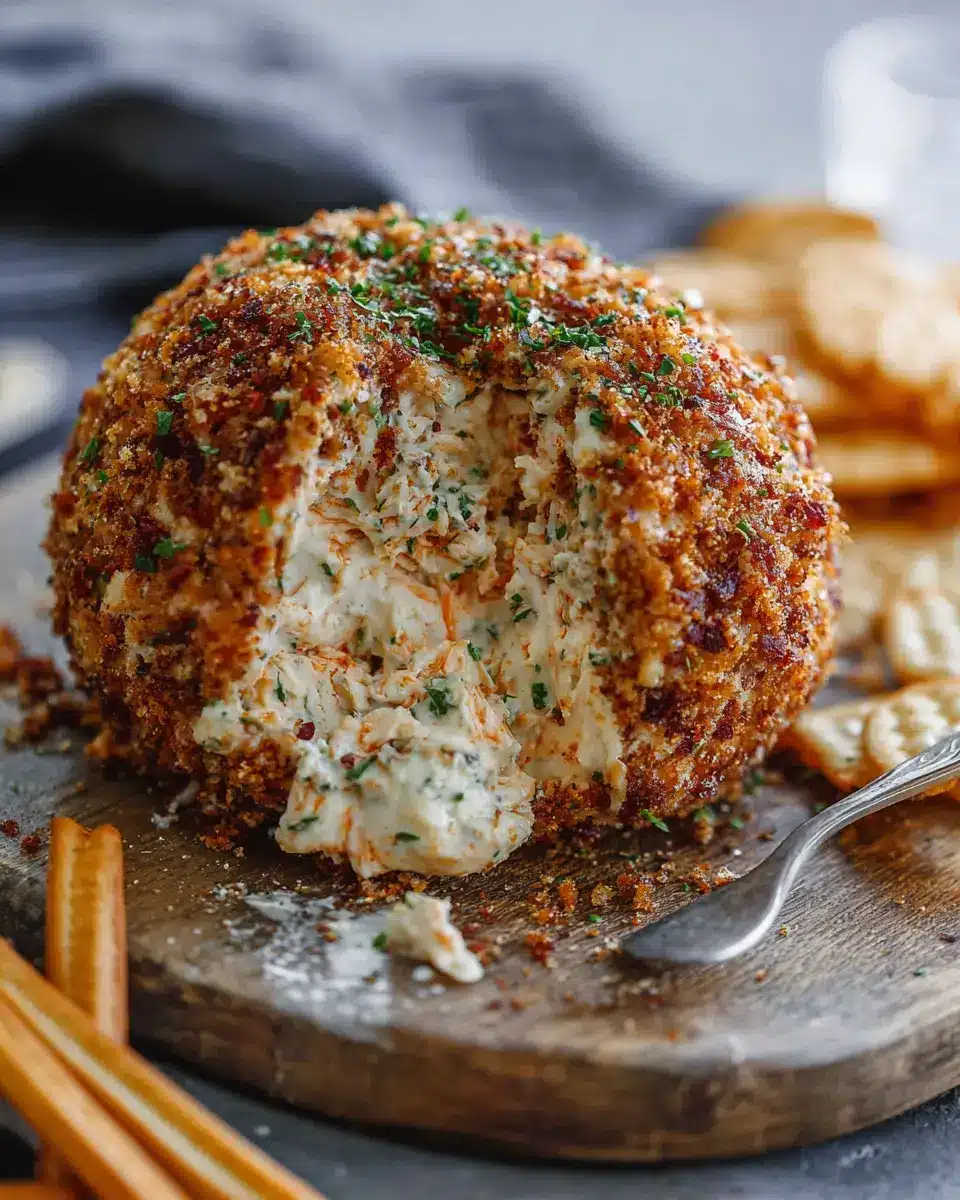
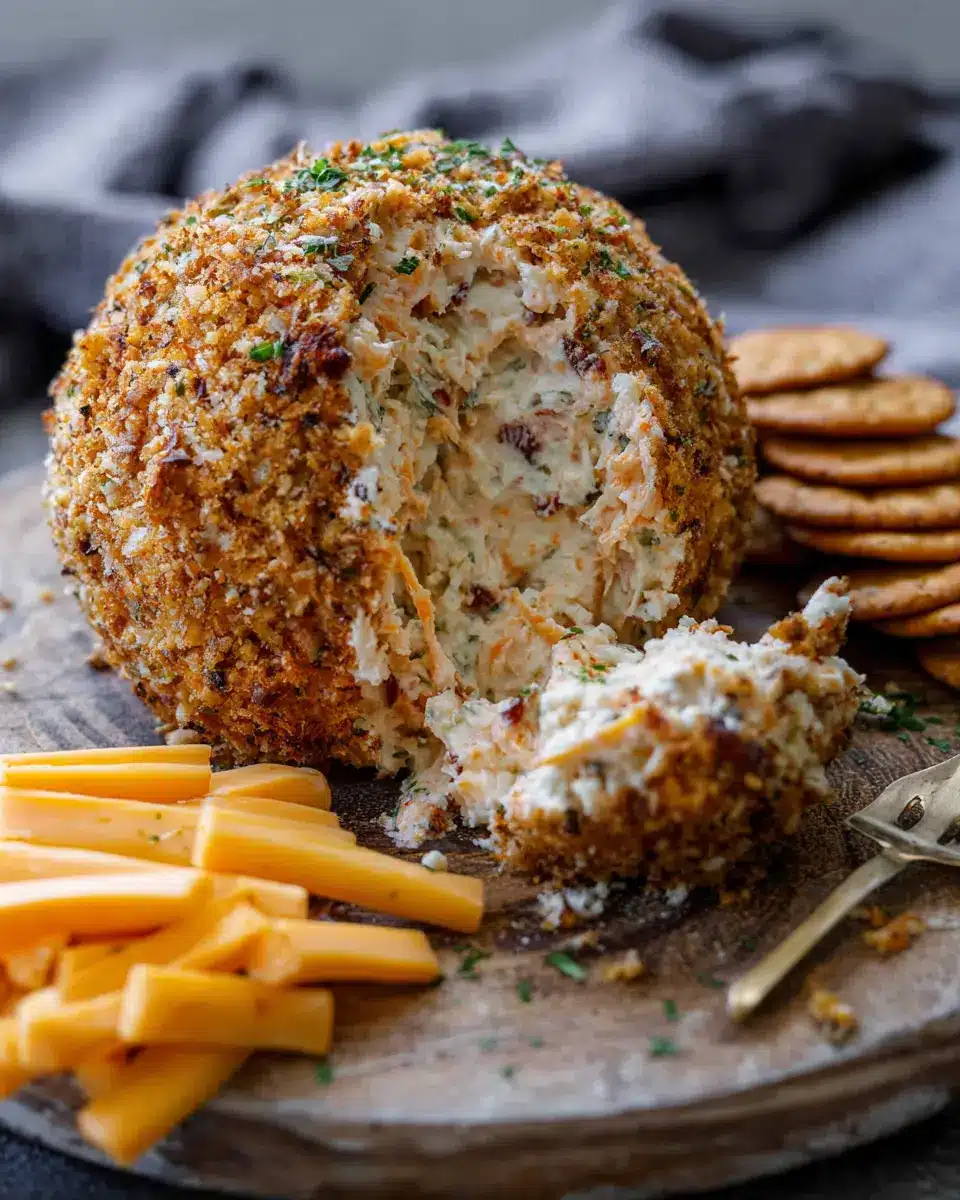
Essential ingredients for a delicious cheese ball
To create the perfect classic cheese ball, you'll need a handful of quality ingredients that come together beautifully. Here’s what you need:
- 16 ounces of cream cheese: Softened for easy mixing.
- 2 cups freshly grated sharp cheddar cheese: Avoid pre-shredded for optimal flavor and texture.
- 2 chopped green onions: For that fresh, zesty kick.
- Worcestershire sauce and hot pepper sauce: Just a teaspoon of each adds a flavorful depth.
- Dried herbs: A teaspoon of parsley, and half a teaspoon each of garlic powder and oregano work wonders.
- Freshly ground black pepper: A dash for seasoning.
- ⅔ cup finely chopped pecans: These add a delightful crunch and nutty flavor.
Recommended substitutes for nut allergies
If you or your guests have a nut allergy, don’t worry! You can still enjoy this classic cheese ball by using alternative ingredients:
- Breadcrumbs: Coating the cheese ball with fine breadcrumbs gives a crispy texture without the nuts.
- Turkey bacon: For a savory twist, chop turkey bacon and use it as a coating.
- Craisins: Finely chopped dried cranberries can add a sweet touch that contrasts beautifully with the creamy cheese.
Feel free to mix and match according to your preferences! Enjoy crafting your perfect cheese ball with these essentials and substitutes.
Preparing the Classic Cheese Ball
Creating a classic cheese ball is not only super simple, but it also makes for a delightful appetizer that’s perfect for any gathering! Follow this step-by-step guide to make your own delicious cheese ball that friends and family will rave about.
Gather and prepare all ingredients
Before diving into the mixing process, make sure you have everything on hand. Here’s what you’ll need:
- 16 ounces of cream cheese, softened for easier mixing
- 2 cups of freshly grated sharp cheddar cheese (stay away from pre-shredded for better flavor and texture)
- 2 green onions, chopped finely
- 1 teaspoon of Worcestershire sauce
- 1 teaspoon of hot pepper sauce (optional for those who enjoy a bit of heat)
- Herbs and spices: 1 teaspoon of dried parsley flakes, ½ teaspoon of garlic powder, ½ teaspoon of dried oregano, and a dash of freshly ground black pepper
- ⅔ cup of finely chopped pecans (or you can substitute with your choice of nuts)
Once gathered, take a moment to chop the green onions and measure out your spices. Having everything ready to go will make the mixing process smoother and more efficient.
Mix the cheese mixture until perfectly blended
In a mixing bowl, start by placing your softened cream cheese. Using a hand mixer or spatula, blend it until it’s nice and smooth. Next, gradually add the freshly grated cheddar cheese, chopped green onions, Worcestershire sauce, hot pepper sauce, parsley, garlic powder, oregano, and black pepper.
It’s important to mix thoroughly until all ingredients are perfectly combined and the mixture is consistent. Remember, the flavor really comes through in this step—take your time to get it just right!
Shape the cheese ball for the perfect form
With your cheese mixture ready, the next step is to shape it into a ball. Scrape the sides of the bowl with a rubber spatula, gathering the mixture into a lump. Lightly grease your hands (this prevents sticking), and gently roll the mixture into a round ball. Ensuring it’s tightly formed gives your classic cheese ball that appealing shape!
Coat with chopped pecans (or your choice of nuts)
Now comes the fun part! Spread your chopped pecans out on a plate. Hold your cheese ball in one hand, and with the other, scoop the pecans and gently press them onto the surface of the ball. Make sure to coat all sides evenly by turning and gently pressing the nuts in—this adds that delightful crunch and flavor contrast!
Chill and prepare for serving
Once your cheese ball is coated, wrap it up in cling wrap and place it in the refrigerator. This step is essential, as chilling allows the flavors to meld together and the cheese ball to firm up—ideally for about an hour.
Before serving, take the cheese ball out of the fridge roughly 20 minutes before you plan to dig in, allowing it to soften just a bit. Pair it with a variety of crackers, pretzels, or even fresh veggies for the ultimate appetizer experience. Enjoy!
Variations on the Classic Cheese Ball
Ready to elevate your classic cheese ball experience? Here are two delicious variations that will surely impress your guests and add a little zest to your next gathering.
Spicy Cheese Ball with Jalapeños
For those who like it hot, incorporate fresh jalapeños or pickled jalapeño slices into the mix! Simply chop about ¼ cup of jalapeños and fold them into the cheese mixture before forming your ball. This spicy twist will give your classic cheese ball a delightful kick that pairs perfectly with tortilla chips or crisp veggies. If you're feeling adventurous, consider adding a dash of cayenne pepper for an extra layer of heat!
Herb-Infused Cheese Ball for a Fresh Twist
If you’re in the mood for something a bit lighter and fresher, try an herb-infused version. Mix in finely chopped fresh herbs like dill, basil, and chives into your classic cheese ball recipe. This herbaceous blend offers a fresh and vibrant flavor profile that’s great on crackers or as a spread for baguette slices. Even better, it's a simple way to impress your guests with something uniquely delicious!
A cheese ball is the perfect canvas for your culinary creativity! Consider checking out sites like Food Network and Epicurious for inspiration and tips on jazzing up your cheese ball further!
Cooking tips and notes for Classic Cheese Ball
Must-know tips for achieving the best flavor
For an unforgettable classic cheese ball, always use freshly grated sharp cheddar cheese instead of pre-shredded—this simple choice enhances flavor and texture. Don’t skip the seasoning; the Worcestershire sauce and a touch of hot pepper sauce will create depth. If you're feeling adventurous, try adding herbs like fresh dill or chives for an extra burst of flavor.
How to store your cheese ball properly
To keep your classic cheese ball fresh, wrap it tightly in plastic wrap and store it in an airtight container in the refrigerator. It will stay good for up to two weeks, depending on the freshness of your ingredients. If you plan to make it ahead, prepare the ball without the nuts and coat it just before serving. For long-term storage, consider freezing it—just remember to add the nuts after thawing! For more storage tips, check out The Kitchn.
Serving Suggestions for Classic Cheese Ball
Best Crackers and Snacks to Pair with Your Cheese Ball
When it comes to enjoying your classic cheese ball, the right accompaniments can elevate the experience. Consider pairing it with a variety of textures and flavors:
- Water crackers: Perfect for their subtle flavor and crisp texture.
- Rye crisps: Offer a delightful crunch and a hint of spice.
- Veggies: Carrot sticks, celery, or bell pepper strips add freshness.
- Pretzels: The saltiness complements the creamy cheese.
Each of these options provides a unique way to savor every delightful bite!
Creative Presentation Ideas for a Festive Platter
Serving your classic cheese ball can be just as fun as making it! A beautiful presentation not only entices guests but also sets the mood for any gathering:
- Mix and Match: Use a large wooden board and arrange your cheese ball in the center with crackers and veggies radiating outward.
- Add Color: Incorporate seasonal fruits like grapes or apple slices for a pop of color.
- Garnish: Sprinkle fresh herbs or edible flowers around the platter for an elegant touch.
Don't forget to include a cheese spreading knife for easy serving, making your cheese ball both sophisticated and approachable. For more ideas, check out this entertaining guide for tips on creating stunning cheese boards!
Time breakdown for Classic Cheese Ball
Preparation time
Creating your classic cheese ball takes just 15 minutes of hands-on work. Simply gather your ingredients, mix, and form your cheese ball. It's as easy as that!
Chilling time
To achieve that perfect firmness, chill your cheese ball for about 1 hour. This step is crucial for allowing the flavors to meld together beautifully.
Total time
In total, you’re looking at about 1 hour and 15 minutes from start to finish, including preparation and chilling. Perfect for a quick snack or gathering with friends!
For more delicious cheese ball recipes and tips, check out Taste Better From Scratch where you can find expert advice and creative serving suggestions!
Nutritional Facts for Classic Cheese Ball
Calories and Serving Size
Enjoying this classic cheese ball is a delightful treat, especially considering its nutritional profile. Each serving contains approximately 124 calories, making it a tasty yet moderate indulgence for gatherings. With about 24 servings per recipe, it's a great option for parties or casual snacking.
Key Nutritional Values to Be Aware Of
This classic cheese ball offers more than just delicious flavors. Here are some key nutritional highlights:
- Protein: 4g per serving – a good source to help keep you full.
- Fat: 12g, with 6g being saturated fat. It's important to enjoy in moderation.
- Carbohydrates: Only 2g, a smart choice for low-carb diets.
- Cholesterol: 29mg – nothing alarming, but keep an eye if you're monitoring your intake.
- Sodium: 129mg – can contribute to your daily limit, so pair it wisely with low-sodium options.
For those curious about specific health needs or diets, you might find MyFitnessPal useful in tracking these values. Staying informed helps you enjoy your classic cheese ball responsibly, keeping your health goals on track!
FAQs about Classic Cheese Ball
Can I prepare a cheese ball ahead of time?
Absolutely! You can make your classic cheese ball days in advance. Just shape it into a ball but hold off on adding the chopped pecans until an hour before serving. Store it wrapped in plastic wrap in an airtight container in the fridge for up to a week. It’s a great way to lighten your prep load for last-minute gatherings!
What can I serve with a cheese ball besides crackers?
The world is your oyster when it comes to serving options! Besides crackers, consider serving your cheese ball with an array of fresh veggies like carrots and celery sticks, pretzels, or even slices of whole grain bread. For a twist, pair it with turkey bacon or chicken ham bites for a savory combination that guests will love.
How long will the cheese ball last in the refrigerator?
When stored properly, your classic cheese ball can last in the refrigerator for about 1 to 2 weeks. Just make sure to keep an eye on the expiration dates of the ingredients used. If you've made a big batch, you can also freeze it without the nuts for up to a month! Just let it thaw in the fridge overnight before serving.
Conclusion on Classic Cheese Ball
Why Your Next Gathering Needs This Classic Recipe
A classic cheese ball is the perfect addition to your next gathering. Its creamy, cheesy goodness paired with crunchy pecans creates an irresistible snack that will have your guests coming back for more. Easy to prepare in just 15 minutes, it’s a guaranteed crowd-pleaser that elevates any appetizer spread! Give it a try and watch the smiles unfold.
For more inspiration and alternatives, check out this guide on party appetizers.

Classic Cheese Ball
Equipment
- Cheese Spreading Knife
Ingredients
- 16 ounces cream cheese softened
- 2 cups freshly grated sharp cheddar cheese avoid pre-shredded cheese
- 2 green onions chopped
- 1 teaspoon Worcestershire sauce
- 1 teaspoon hot pepper sauce
- 1 teaspoon dried parsley flakes
- ½ teaspoon garlic powder
- ½ teaspoon Dried oregano
- dash freshly ground black pepper
- ⅔ cup pecans finely chopped
Instructions
- Place cream cheese in a mixing bowl then mix until smooth. Add cheese, green onion, Worcestershire sauce, hot sauce, parsley, garlic powder, oregano, and pepper then mix well to combine.
- Use a rubber spatula to scrape the sides of the bowl and gather the mixture into one lump. Lightly grease your hands and form the mixture into a round ball.
- Place the pecans on a plate. Hold the cheese ball in one hand and use the other hand to scoop the pecans onto the outside of the ball, pressing them in gently and turning the ball to coat all sides.
- Cover the cheeseball in cling wrap and refrigerate for about 1 hour to allow it to firm up. Remove from fridge about 20 minutes before serving.
- Serve with crackers, pretzels, vegetables or anything else you'd love to dip in cheese!

Leave a Reply