
Introduction to Grandma’s Banana Nut Bread
There's something uniquely comforting about Grandma's Banana Nut Bread. Perhaps it’s the delightful aroma wafting through the house or the warm memories gathered around the kitchen table as we enjoyed thick, buttery slices together. This recipe is not just another banana bread; it’s a family tradition, passed down through generations and filled with love—and a few secret ingredients, of course!
Why Grandma’s Banana Nut Bread is a Family Favorite
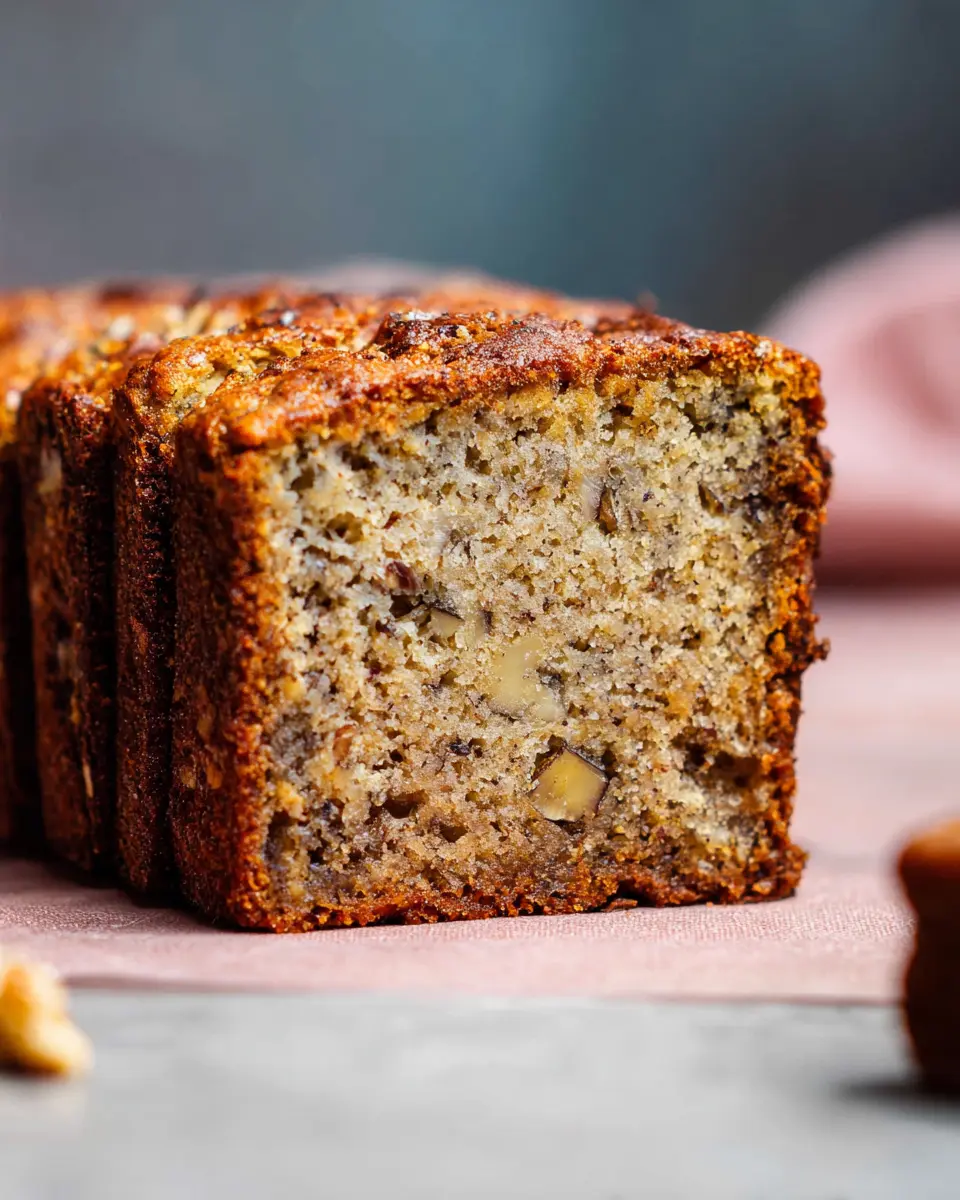
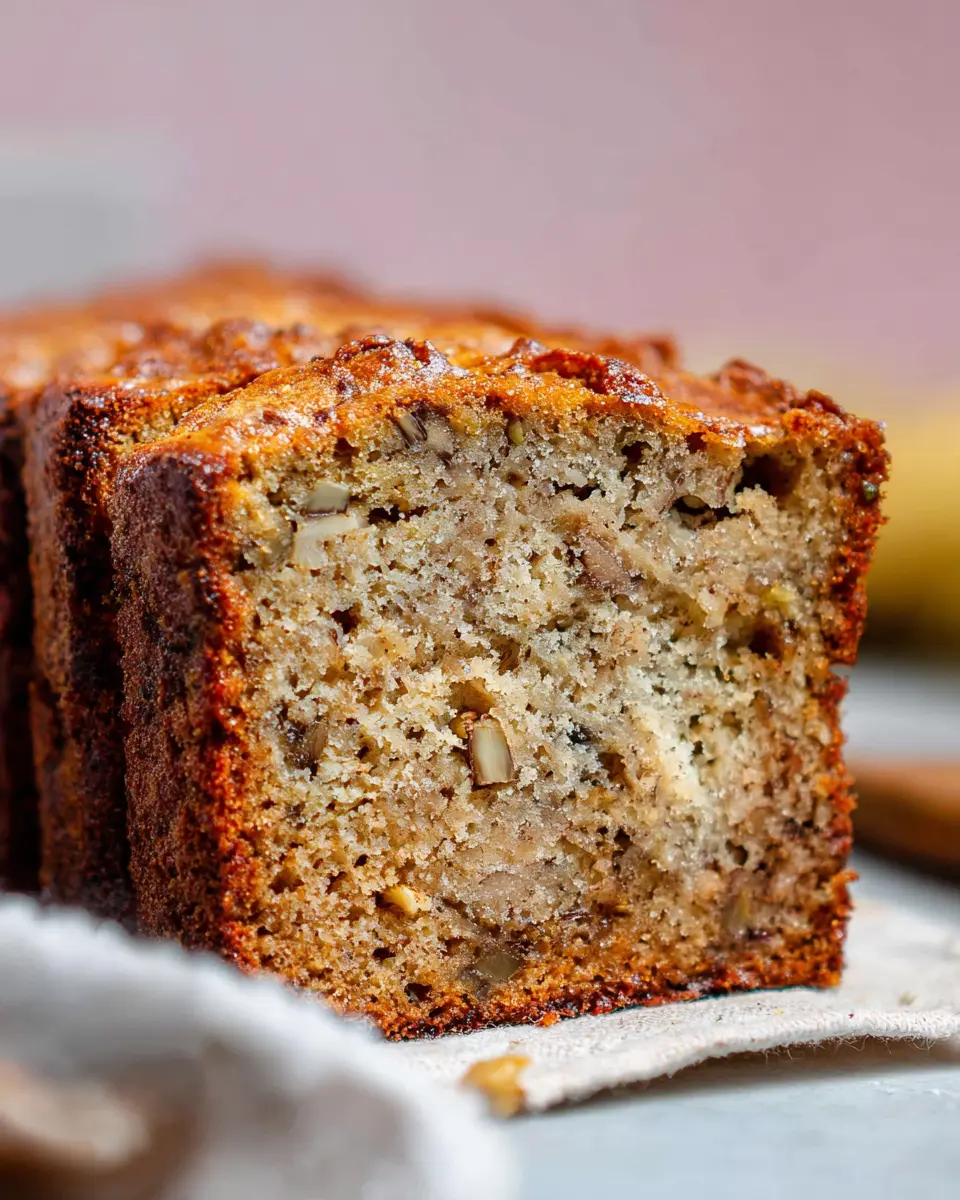
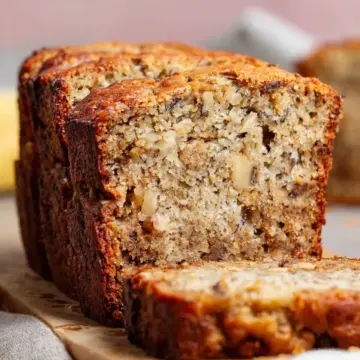
So, what makes this banana nut bread such a beloved treat? For starters, it’s incredibly moist and flavorful, thanks to the use of ripe bananas that are bursting with sweetness. The addition of chopped walnuts provides a satisfying crunch, while the hint of vanilla and just a pinch of salt balances the flavors perfectly.
Many families treasure this recipe not just for its taste but for the moments it creates. Whether it’s a lazy Sunday morning or a post-dinner indulgence, a slice of this bread always brings smiles. Plus, it's versatile! Add some chocolate chips for a decadent twist or swap in your favorite nuts to personalize the flavor. With its adaptability, it’s easy to understand why this has become a staple in kitchens everywhere.
If you're looking to recreate a slice of nostalgia, let's get baking! You won't regret it. Curious about where to start? Grab your overripe bananas, and let’s dive into the recipe.

Ingredients for Grandma’s Banana Nut Bread
Essential ingredients for a delicious loaf
To create the perfect loaf of Grandma’s Banana Nut Bread, you'll need a mix of simple yet essential ingredients that come together beautifully. Here's what you'll need:
- 2 cups all-purpose flour
- 1½ teaspoons baking soda
- Pinch of salt
- 1 cup granulated sugar
- ½ cup vegetable oil
- 2 eggs
- 1 teaspoon vanilla extract
- 4 medium ripe bananas, mashed (about 1⅓ cups)
- 1 cup coarsely chopped walnuts
These ingredients form the backbone of this delightful recipe, promising a moist, flavorful banana bread that everyone will love.
Optional ingredients for customization
Once you've got the essentials, it's time to get creative! Here are some optional additions to make your Grandma’s Banana Nut Bread uniquely yours:
- Cinnamon: A sprinkle can elevate the flavor—try starting with ½ teaspoon.
- Chocolate chips: Regular, peanut butter, or even butterscotch variations can add delicious sweetness.
- Dried fruits: Toss in raisins, cranberries, or blueberries for a fun twist.
- Different nuts: If you're not a walnut fan, consider pecans, hazelnuts, or even almonds.
Feel free to experiment! Customizing family recipes like Grandma’s Banana Nut Bread makes them even more special.
Step-by-Step Preparation of Grandma’s Banana Nut Bread
Making Grandma’s Banana Nut Bread is a delightful journey that fills your kitchen with warm aromas and a sense of nostalgia. Follow these straightforward steps, and you’ll create a scrumptious loaf that’s perfect for breakfast, snack time, or dessert. Let’s dive right in!
Preheat the oven and prepare the pans
Start by preheating your oven to 350°F (175°C). This ensures that your bread bakes evenly and comes out fluffy. While the oven is warming up, greasing your two 8×4-inch loaf pans is essential. A light coating of vegetable oil or non-stick spray will prevent the bread from sticking, allowing for easy removal once it’s baked.
Mix the dry ingredients together
In a medium bowl, combine the all-purpose flour, baking soda, and a pinch of salt. Whisk these together until they're well integrated. This helps to evenly distribute the baking soda, ensuring a uniform rise and a light texture. Once blended, set the bowl aside. It's a small step, but it makes a big difference in the final result!
Combine the wet ingredients in a separate bowl
Now, grab a larger bowl and whisk together the granulated sugar, vegetable oil, eggs, and vanilla extract. A gentle whisking is all that's needed here—you’re not looking for froth, just a smooth combination. This mix will provide a lovely richness to your bread.
Blend in the ripe bananas
Next, it’s time to bring the bananas into the mix! Mash your ripe bananas in a separate bowl. If you’ve picked out bananas with brown spots, congratulations! They will add natural sweetness and moistness to your bread. Stir the mashed bananas into your wet ingredients until they're well combined.
Combine wet and dry ingredients, then fold in walnuts
Now for the magic moment! Pour your dry ingredients into the wet mixture. Stir gently until just combined, being careful not to overmix (no one wants tough bread!). Once blended, fold in the coarsely chopped walnuts for that perfect crunch and nutty flavor. If nuts aren’t your thing, feel free to leave them out or opt for another type, like pecans.
Pour batter into prepared pans and bake
Evenly divide the batter between the two greased loaf pans. Slide them into the oven and bake for 35 to 45 minutes. You’ll know they’re done when a knife inserted in the center comes out clean. If they start browning too quickly, cover them with a piece of foil for the last few minutes of baking.
Cool and store the bread
Once baked, allow your bread to cool in the pans for about 10 minutes. This makes it easier to turn them out onto a wire rack to cool completely. If you can resist the temptation, let it cool for a bit longer before cutting—this brings out the best flavors. Wrap tightly in plastic wrap for easy storage at room temperature for up to five days. If you're feeling generous, consider sharing with friends, or make some quick muffins from the batter for a different treat!
Baking Grandma's Banana Nut Bread not only fills your home with a delightful scent but also brings a sense of warmth and comfort—perfect for any occasion. Enjoy every bite, and don’t forget to savor those cherished memories associated with each slice!
Variations on Grandma’s Banana Nut Bread
Adding chocolate chips for a sweet twist
Want to elevate Grandma’s classic banana nut bread? Incorporate a cup of semi-sweet chocolate chips into the batter! The rich chocolate perfectly complements the sweetness of the ripe bananas, creating a delightful flavor contrast. For a different taste, consider trying white chocolate or peanut butter chips for a unique spin that will tantalize your taste buds.
Using different nuts or leaving them out completely
While walnuts are traditional, feel free to experiment! Pecans, hazelnuts, or even almonds can add a crunchy texture and different flavors to your banana nut bread. If nuts aren't your thing, simply omit them for a smooth, nut-free loaf that’s deliciously moist.
Making muffins instead of bread
In a hurry or craving a portable snack? Transform Grandma’s banana nut bread into delightful muffins! Just line your muffin tin with paper liners, fill them ¾ full with batter, and bake for about 24 to 28 minutes. You’ll have bite-sized treats perfect for breakfast or an afternoon pick-me-up! For detailed instructions on this transformation, check out this muffin-making guide.
Cooking Tips and Notes for Grandma’s Banana Nut Bread
Choosing the Ripest Bananas
When making Grandma’s Banana Nut Bread, the key to deliciousness lies in your choice of bananas. Opt for bananas that are heavily speckled with brown spots — the riper, the sweeter! This added sweetness not only enhances the flavor but also contributes to a moist loaf. A general rule? The more “vintage” the banana looks, the better!
How to Tell When the Bread Is Done
Knowing when your bread is perfectly baked is crucial. You can perform the classic toothpick test: insert a toothpick or thin knife into the center of the loaf. If it comes out clean, you're good to go! If it comes out with batter on it, give it a few more minutes in the oven. Keep an eye on it, and if the tops start browning too quickly, don’t hesitate to cover with foil.
Storing and Freezing Tips for Freshness
To keep your Grandma’s Banana Nut Bread fresh, wrap it tightly in plastic wrap after it's completely cooled, and store it at room temperature for up to 5 days. If you want to enjoy it later, freezing is a fantastic option! Simply wrap in plastic wrap, followed by aluminum foil, and pop it in the freezer for up to 3 months. When you're ready to enjoy it again, just let it thaw in the refrigerator or on your kitchen counter.
For expert tips on freezing bread, check out this helpful guide from The Kitchn.
Serving Suggestions for Grandma’s Banana Nut Bread
Best Ways to Enjoy It Fresh
The beauty of Grandma’s Banana Nut Bread is in its versatility! Enjoy it fresh from the oven, when it's still warm and fragrant. Simply slice it and savor it as is, or spread a generous layer of butter or cream cheese for extra richness. It's perfect for breakfast with a cup of coffee or as an afternoon snack with herbal tea.
Creative Toppings and Pairings
Elevate your banana bread experience with creative toppings and pairings:
- Nut Butter: Spread almond or peanut butter for a protein-packed twist.
- Fruits: Top with fresh banana slices or berries for a refreshing contrast.
- Maple Drizzle: A light drizzle of maple syrup can enhance its sweetness beautifully.
- Greek Yogurt: Serve a dollop of Greek yogurt on the side for a creamy texture.
Looking for more ideas? Check out this guide for endless toppings and pairings!
Time Breakdown for Grandma’s Banana Nut Bread
When the craving for Grandma’s Banana Nut Bread strikes, it’s all about knowing how long you’ll need. Here’s a quick look at the time breakdown for making this delicious treat.
Preparation Time
In just 10 minutes, you can have everything ready to go. This includes measuring out the ingredients and mixing them together. Perfect for busy days!
Baking Time
Bake your banana nut bread for 40 minutes. Just enough time to enjoy the sweet aroma wafting through your kitchen. Make sure to check that knife testing for doneness!
Total Time
From start to finish, you’ll be looking at around 50 minutes. In less than an hour, you can enjoy a comforting slice of nostalgic goodness.
For more baking tips, check out this great guide on banana bread techniques. Happy baking!
Nutritional Facts for Grandma’s Banana Nut Bread
Calories per serving
Enjoying a slice of Grandma’s Banana Nut Bread means savoring about 219 calories per serving. This warm, comforting bread is perfect for any time of day, whether you’re treating yourself to a breakfast slice or an afternoon snack.
Breakdown of key nutrients
When it comes to nutrition, this delightful recipe provides a balanced mix:
- Carbohydrates: 28g – A great source of quick energy.
- Protein: 3g – Helpful for muscle repair and growth.
- Fat: 10g – Primarily from the healthy oil and walnuts.
- Fiber: 1g – Important for digestive health.
Additionally, it contains essential vitamins and minerals, such as Vitamin C, Iron, and Calcium. With the wholesome ingredients combined, Grandma’s Banana Nut Bread not only satisfies your sweet tooth but also contributes to your daily nutrient intake! For a deeper dive into the nutritional benefits of bananas, visit Healthline.
FAQs about Grandma’s Banana Nut Bread
How can I ripen bananas quickly?
If you're in a pinch and need ripe bananas for Grandma’s Banana Nut Bread, you can speed up the ripening process! Just place your unripe bananas in a brown paper bag and fold the top closed. The ethylene gas produced will help them ripen within 1 to 2 days. Alternatively, if you need them right away, you can bake them in their skins at 300°F (150°C) for about 15-20 minutes until they’re blackened and soft.
Can I substitute ingredients in the recipe?
Absolutely! Grandma’s Banana Nut Bread is versatile. You can swap the all-purpose flour for whole wheat flour or almond flour for a gluten-free option. If you’re not a fan of walnuts, pecans or even chocolate chips work well too! For a tad more flavor, add a dash of cinnamon or nutmeg.
How long does banana bread last?
Once baked, Grandma’s Banana Nut Bread can stay fresh for up to 5 days when wrapped tightly and stored at room temperature. For longer storage, you can freeze it for up to 3 months. Just make sure it's well-wrapped to prevent freezer burn! For the best results, thaw it in the fridge or at room temperature before enjoying.
Conclusion on Grandma’s Banana Nut Bread
Grandma's Banana Nut Bread is more than just a recipe; it’s a cozy memory waiting to be baked! With its rich banana flavor and delightful crunch from the walnuts, it's sure to be a hit at your next gathering. Enjoy it fresh, share it with friends, or even freeze some for later—this bread is here to make your days sweeter!
Grandma’s Banana Nut Bread
Equipment
- 8x4-inch loaf pans
- medium bowl
- large bowl
- rubber spatula
Ingredients
Dry Ingredients
- 2 cups all-purpose flour 240 g
- 1.5 teaspoons baking soda
- 1 pinch salt
Wet Ingredients
- 1 cup granulated sugar 198 g
- 0.5 cup vegetable oil 99 g
- 2 units eggs
- 1 teaspoon vanilla extract
- 4 medium ripe bananas mashed (about 1⅓ cups or 303 grams)
Add-ins
- 1 cup coarsely chopped walnuts 113 g
Instructions
Baking Instructions
- Preheat oven to 350 degrees F. Grease two 8×4-inch loaf pans; set aside.
- In a medium bowl, whisk together the flour, baking soda and salt; set aside.
- In a large bowl, whisk together the sugar, oil, eggs, and vanilla extract. Add the bananas and stir gently to combine.
- Add the flour mixture and stir until completely blended. Using a rubber spatula, fold in the walnuts.
- Divide the mixture into the two loaf pans. Bake for 35 to 45 minutes, or until a thin knife inserted into the center comes out clean.
- If the loaves begin to get too dark before they are done in the middle, cover with foil.
- Allow to cool in the pans for 10 minutes, then turn out onto a wire rack to cool completely.


Leave a Reply